The cost of hiring movers specializing in piano is well worth the peace of mind and safety of knowing your precious instrument will be handled with care. Damage during a move can be costly to say the least.
Several tools are needed for Baby Grand Piano Moving including a heavy-duty furniture dolly rated for the weight of the piano, a piano skid board, and furniture straps. Contact Baby Grand Piano Moving Charleston now!
When you own a Baby Grand Piano you may be considering moving it from one location to another. The task isn’t easy and it takes special equipment to get the job done without any damage. Many homeowners choose to hire a professional Piano Moving company that specializes in this type of move. They will have dollies and straps designed specifically for this type of work. If you decide to go this route be sure to check the company’s reputation online and compare prices to other companies. Damaging your piano isn’t worth the cost-cutting of hiring a cheaper company.
The first step in the process is to prepare the Piano for moving. This means removing the lid, disassembling the pedals and securing them to prevent any accidental movement during the move. Next the movers will remove the legs. This is a laborious job and is best left to the professionals. Once the legs are off the Piano can be rested against a padded board which will distribute the weight evenly and prevent any damage to the body of the piano. Once the piano is properly prepared it will be loaded onto a dolly for transportation to the new location.
Throughout this whole process the movers will take careful measures of doorways and staircases to ensure that the piano can be maneuvered through them. This will also allow them to note any spots that will require special care in navigating such as tight areas or corners. The movers will also make a note of any furniture that will need to be moved to clear the path. This will help to save time and effort once the piano is in the final location.
Other important preparations include closing pets and children in another room so they don’t get in the way or get hurt during the move. It is also important to protect the Piano from changing temperatures and humidity levels during transport. These conditions can be hard on the delicate parts of the instrument. A good way to avoid these problems is to invest in a good climate control unit for the Piano. This will keep the Piano in a stable temperature and humidity level that is best for it. This will help to preserve the Piano for a longer period of time and will help it to last much longer than if it was simply stored in a garage or attic. This is why many Piano owners invest in a proper storage system for their instruments when they aren’t playing them.
Loading
If you’re moving a grand piano, it will need to be disassembled and padded before it can be loaded onto what is called a grand board. This process requires a lot of manpower and specialized equipment. Generally, only professional piano movers can get these jobs done without a lot of drama. It’s hard to overstate how complicated it is to move a large, expensive, fragile instrument like a baby grand. Attempting to do it yourself will probably result in damage.
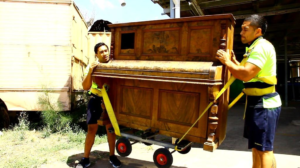
Once the movers have prepared the piano for transport, they’ll use lifting straps to load it onto the dolly. The movers will then secure the dolly to the piano with ratchet straps to prevent shifting or slipping during the moving process. They’ll also prep the stairs, making sure that they’re wide enough for the piano to fit, and removing anything that will be in the way. This can include laying down plywood, cardboard, or other floor protection along the path that the piano will travel to avoid scuffing or damaging the flooring.
The movers will then carefully walk the piano out of the house, with assistance if necessary. They’ll take the time to examine the path that it will travel down, ensuring that doors are wide open and not stuck in their jambs. They’ll also make sure that the path is clear of any obstructions, removing rugs or furniture as needed.
Once the piano is outside, it’ll be loaded into the truck. Depending on the size of the truck and the access to it, it may be necessary to remove doors from their jambs. The movers will then carefully place the piano inside of the truck and wrap it in blankets for additional protection.
It is possible to move a large, expensive piano on your own if you have the right equipment and knowledge. It will be difficult, however, and you’ll likely need to rent a truck that is capable of holding the weight. It’s also important to understand that it will require a significant amount of physical effort to maneuver the piano, so you’ll need to recruit several strong friends to help you with the process. Just be sure to offer pizza and beer as an incentive!
Transporting
A professional piano mover will come with a dolly, straps, and furniture blankets to protect the instrument during transport. It will take a team of at least two people to move a baby grand piano, though more is preferable. A crew will carefully plan the route and deal with obstacles like stairs, doorways, and tight corners. They may even need to remove doors or move furniture in order to get the piano through. If the move is going to include outdoor steps, it is important that the weather is dry and not windy. A windy day can cause the piano to shake and shift, which can lead to damage.
In addition to the right equipment, a professional will also have the experience needed to properly pack and secure the piano for transport. This will prevent the piano from being damaged during loading, transit, and unloading. The professional will know how to secure the piano in the truck to ensure it does not move during transportation. They will also have knowledge of the different types of pianos and what the best methods are for moving each one.
Once the piano is in its new home, it will need to be reassembled. If it was disassembled for the move, this will be much easier. The legs will need to be screwed back on, and the pedals will need to be reattached. The movers will follow the labels that were made during packing to make sure everything is reassembled correctly. The piano will then need to be tuned. A professional piano tuner will need to be hired, as a move can throw off the tuning of an instrument.
Trying to move a baby grand piano yourself or hiring a generic moving company can be disastrous. Baby grand pianos require a lot of finesse and expertise that is not found in upright pianos. If you are serious about moving your piano without damaging it, contact a professional on uShip to get quotes from qualified movers who will know exactly what they are doing.